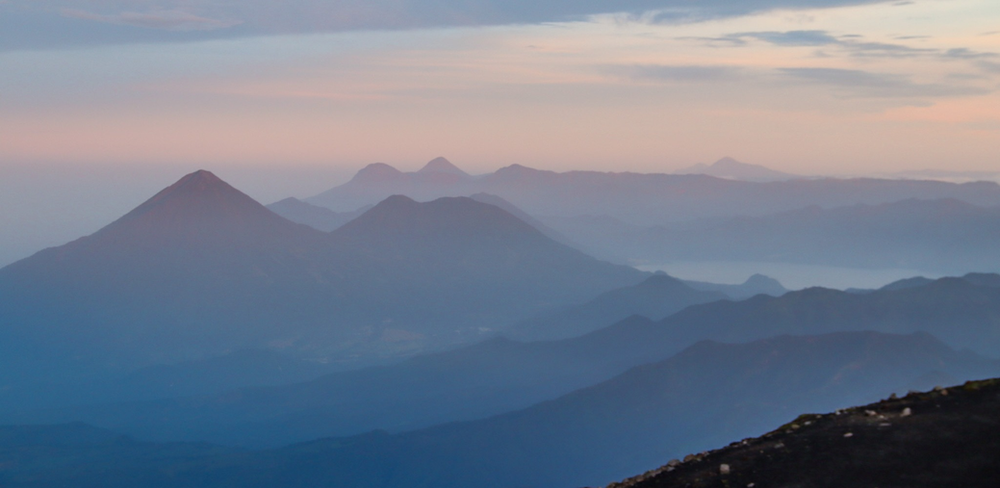
Guatemala was the perfect start of my half-year journey across Central America. I flew into Guatemala City and went straight to Antigua, where my slow solo trip started. No plan, no end date, just a 55L backpack and an adventurous and curious soul. Let me share my travel route and give you inspiration for your journey across the country of 37 volcanoes, indigenous cultures and scenic bus journeys.
n
Antigua
n
Quetzaltenango
n
Lake Atitlan
n
Lanquin
n
Flores
n
Antigua – 9 nights
n
I initially booked three nights in Antigua and ended up staying for nine. This colonial town is easy to fall in love with. Its charming streets and cute shops and restaurants do the trick. Antigua also offers plenty of cool day trips though. The most popular one is the overnight hike of Volcán Acatenango, during which you get to see the active volcano Fuego erupt and colour the ashes orange at night.
nn
How to get from the airport to Antigua
nn
There are lots of ways to get to Antigua from the airport in Guatemala City. I arrived late at night and therefore preferred having my transportation figured out beforehand, but this isn’t a must. I’d booked an airport transfer through the hostel I was staying at. Most ho(s)tels in Antigua offer this service! It costs around $30, and it would obviously be cheaper if you would share it with other travellers.
nn
Airport taxis would be a fairly expensive option as well. I don’t know the exact prices, as I chose the reliability of a hostel transfer over an airport taxi. You will find lots of taxi drivers approaching you as you leave the arrival hall. Ordering an Uber is usually cheaper!
nn
Tip for budget solo travellers: pop a message in ,this Facebook group to see if there’s anyone you can share transport with!
nn
If you want to dive right into the Guatemalan experience, the chicken bus would be your way to go! Expect an adventurous ride, as the road between Guatemala City and Antigua includes a lot of curves, and the bus driver doesn’t seem to bother slowing down. It’s the cheapest way to get to Antigua and shouldn’t cost more than a couple of dollars.
nn
To do
n
Visit Arco de Santa Catalina in the early morning
n
Take a walk to viewpoint Cerro de la Cruz
n
Try new food at the Central Market
n
Go people-watching at the central park
n
Do a chocolate workshop in town
n
Take a day trip to Hobbitenango
n
Visit Catedral de Santiago
n
Hike Acatenango volcano
n
Read about everything you need to know about your visit to Antigua in the free guide I created. It includes more information about Acatenango, the best restaurants in town, and where to stay. You can grab a copy by subscribing to my mailing list at the very bottom of this page.
n
n
Quetzaltenango (Xela) – 7 nights
n
Not the most typical city to visit in Guatemala, which is arguable. Yes, it’s not the prettiest city you’ll come across during your travels, but it does have a lot of cool day trips to offer! Quetzaltenango, also known as Xela, is surrounded by volcanoes, among them the highest volcano in Guatemala. I didn’t take any day trips from Xela though, as I was there to further improve my Spanish at one of the many language schools: Utatlán. As I already was on a B2 level beforehand, the private lessons weren’t much of an addition to me, but I wouldn’t have wanted to miss this, as I got to stay with a local family for a full week! Elizabeth was the sweetest host, and I’m still in touch with her daughters through Instagram.
nn
How to get from Antigua to Xela
nn
I had conveniently arranged my transfer from Antigua to Xela through Utatlán, my language school. At like any backpacker’s spot in Guatemala, though, you can just ask at your hostel about shuttle options. The drive from Antigua to Xela takes about 5 hours and costs 200Q.
nn
To do
n
Stay with a local family
n
Attend a Spanish language school
n
Go sightseeing in the old centre
n
Interact with locals at Mercado La Democracia
n
Visit Fuente Georginas hot springs
n
Hike to the holy Lake Chicabal (the crater of a volcano)
n
Face the highest volcano in Guatemala (Tajumulco)
n
n
n
Lago de Atitlán – 7 nights
A popular spot for backpackers, and in my opinion, it lives up to the hype. I’m a very down-to-earth person, but there’s something magical about Lake Atitlan that made me feel at peace there. You can easily spend a week here, and there are many towns to choose from. I can recommend starting at the biggest town, Panajachel, as this is where most buses and shuttles arrive into. I then went to stay at Santa Cruz, which is a much smaller, quiet town, featuring the best views of the volcanoes.
nn
How to get from Xela to Lake Atitlan
nn
Again, my shuttle was arranged through Utatlán. It’s about a 3-hour drive from Xela to Panajachel this time.
nn
To do
n
Explore Reserva Natural Atitlan to watch coatis, birds, and monkeys while walking on hanging bridges and passing a stunning waterfall
n
Look for street art in Panajachel
n
Hike the Indian Nose during sunrise
n
Explore other towns by taking the public boats
n
Go supping in the early morning
n
Take a yoga class at ,Selina Hostel with a view of the lake
Since I wanted to go to Lanquin for Semuc Champey next, and you’ve got to pass Antigua (coming from Lake Atitlan), I figured I’d spend an extra week there. ¿Por qué no?
nn
How to get from Lake Atitlan to Antigua
nn
Panajachel is the most convenient town to travel from. There are lots of tourist shuttles leaving from Panajachel to Antigua daily. I suggest booking them directly at the shuttle service instead of through your hostel. One of the shuttle services is located near the main dock in Panajachel. They cost 100Q (around $13) and leave at 5 AM, 9 AM, 12 PM and 4 PM (October 2021).
nn
I travelled from Panajachel to Antigua by chicken bus. Since there’s no direct bus, and chicken buses have no schedules, I thought it might be helpful to share my route below:
nn
Panajachel – Sololá: 15 min / 5Q
n
Sololá – Los Encuentros: 30 min / 5Q
n
Los Encuentros – Chimaltenango: 75 min / 20Q
n
Chimaltenango – Antigua: 40 min / 10Q
nn
Be aware that you need to pay halfway through each ride, when the bus driver’s companion starts walking through the bus to collect everyone’s money. They tend to let tourists pay more, so keep an eye on (or ask around) what locals are paying. I ended up paying double (40Q) for the ride from Los Encuentros to Chimaltenango.
n
Lanquin – 2 nights
n
The town itself offers nothing worth mentioning, but you’re likely to stay here if you’re keen on visiting Semuc Champey. A gorgeous green valley with beautiful blue water flowing through it. Most hostels offer a day tour to Semuc Champey for about $18 pp. It includes caving (not for the claustrophobic), going to a waterfall, swinging into the water, hiking for about 40 min up to beautiful a viewpoint, and going for a refreshing dip in the water afterwards.
nn
How to get from Antigua to Lanquin
nn
Since Lanquin is located further away from Antigua, I would suggest paying a little extra for a tourist shuttle, rather than taking a lot of different chicken buses. It’s obviously possible to go by chicken bus, just ask at your hostel about the first bus you need to take. The trip from Antigua to Lanquin is a scenic one and takes about 8-9 hours by shuttle bus, which you can book at almost every hostel. I booked mine through ,Somos hostel and it cost me 225Q in 2021.
nn
To do
n
Chill at the pool of your hostel
n
Go tubing in the river
n
Visit Semuc Champey (on a tour)
n
n
n
Flores – 4 nights
Located in the very northeast of Guatemala, relatively close to the border of Mexico and Belize, you’ll find the island of Flores, in Lago Petén Itzá. The town is small and colourful, and a perfect base for those wishing to visit the Maya ruins of Tikal. There are no cars on the island, but everything is within walking distance anyway.
nn
How to get from Lanquin to Flores
nn
This is another long scenic bus drive, which is recommended to do by shuttle bus again. The costs would be around 300 quetzals and it takes about 10 hours.
nn
To do
n
Day trip to Tikal
n
Take a boat to some of the beaches around the lake for a swim
n
Day trip to Yaxha (less visited Maya ruins)
n
Day trip to the Blue Crater for a swim in clear waters
n
n
n
n
Antigua – 2 nights
n
I then returned to Antigua a third time, to have a final convenient stop in Guatemala before moving on to my second country of this trip.
nn
The trip from Flores to Antigua takes about 11-12 hours by shuttle bus and costs 300Q during the day and 420Q at night. They also stop at Rio Dulce, which is another destination in Guatemala that you could add to your itinerary.
nn
My route in summary
nn
Antigua: 9 nights
n
Xela: 7 nights
n
Atitlan: 7 nights
n
Antigua: 7 nights
n
Lanquin: 2 nights
n
Flores: 4 nights
n
Antigua: 2 nights
nn
Alternative 3-week route
nn
Antigua: 6 nights
n
El Paredon: 3 nights
n
Atitlan: 6 nights
n
Lanquin: 2 nights
n
Flores: 3 nights
n
Antigua: 1 night
nn
Alternative 4-week route
nn
Antigua: 7 nights
n
El Paredon: 3 nights
n
Atitlan: 7 nights
n
Lanquin: 3 nights
n
Flores: 3 nights
n
Rio Dulce: 2 nights
n
Antigua: 3 nights
nn
Alternative 5-week route
nn
Antigua: 7 nights
n
Xela: 4 nights
n
Atitlan: 7 nights
n
El Paredon: 3 nights
n
Antigua: 3 nights
n
Lanquin: 2 nights
n
Flores: 4 nights
n
Rio Dulce: 2 nights
n
Antigua: 3 nights
nn
And that marks 5 incredible weeks in Guatemala! Next up: El Salvador.
Looking for some more info about this part of the world? Have a look at my ,other destinations in Latin America.n
n
Do you have any questions about my travels, or do you see a great opportunity to collaborate? Feel free to send me an ,Instagram DM or email (floraflies.nl@gmail.com).
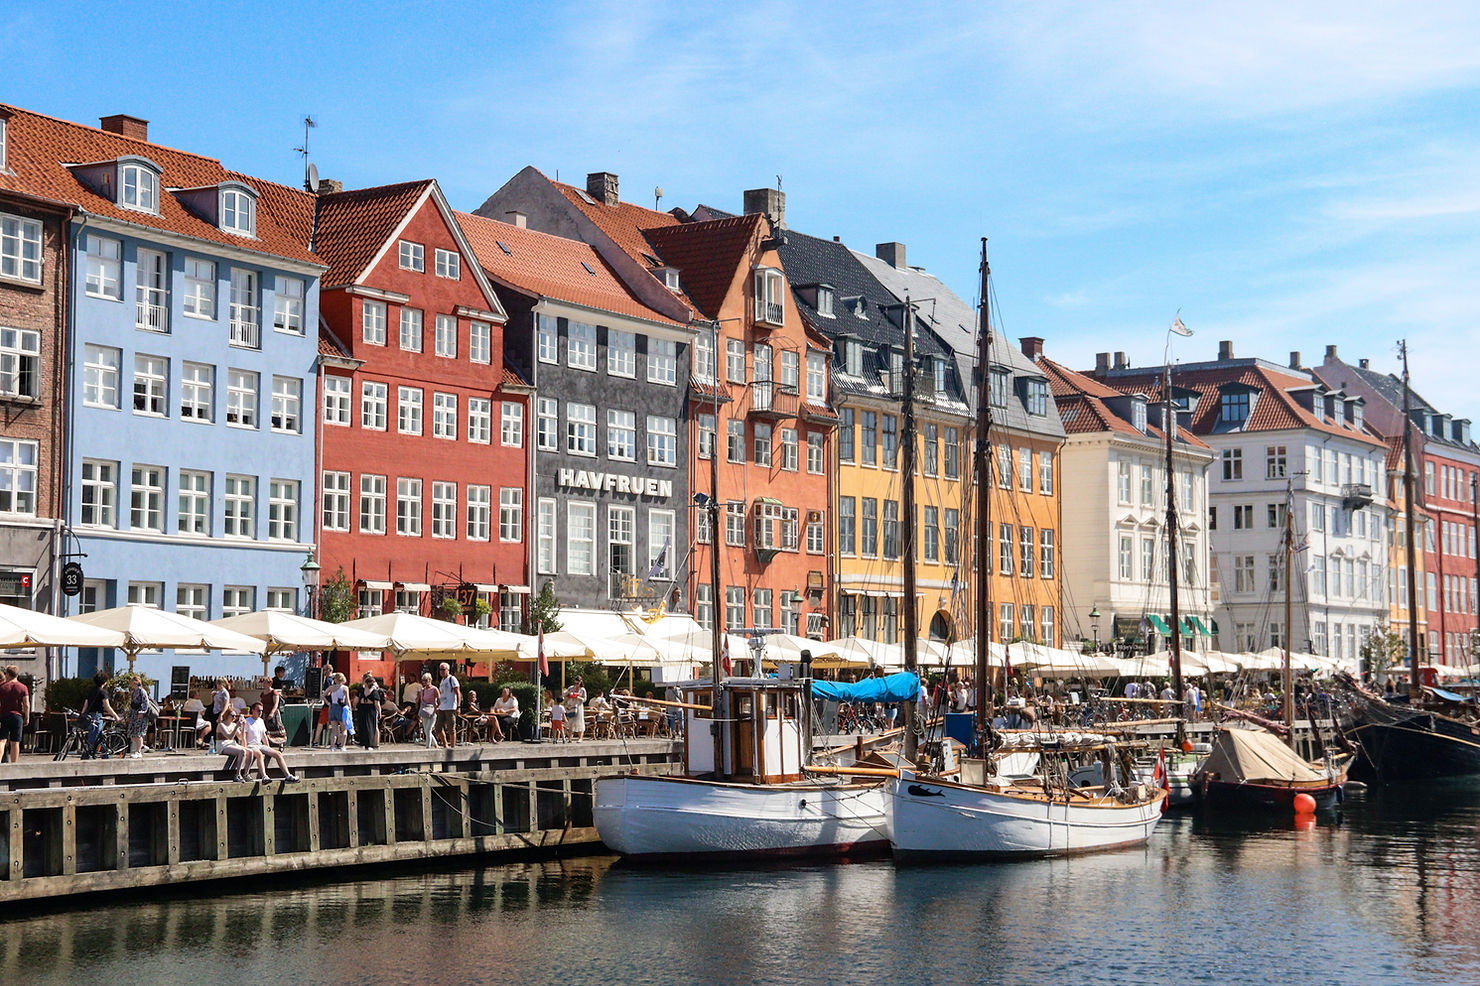
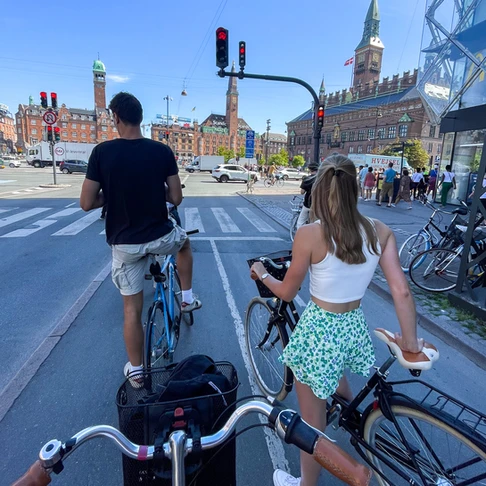
In today’s episode of “cities I wanna move to”. It’s getting out of hand. Copenhagen. What a city! I love the people, the cafes, the colourful streets, the parks, the nightlife and just the overall vibe of Copenhagen. It’s a great mix of the arty, trendy areas of Amsterdam and Berlin. Add the cleanness and calmness of Scandinavia and I think you’ve got the right image. Getting curious? Here you’ll find my recommendations for your city trip!
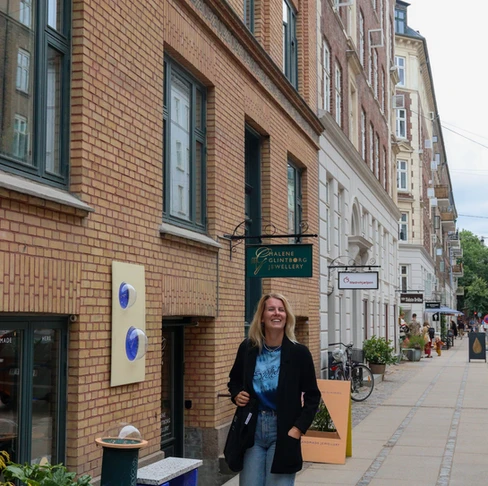
2) Enter all the specialty and secondhand shops at Jaegersborggade
3) Enjoy a DIY picnic at Ørstedsparken
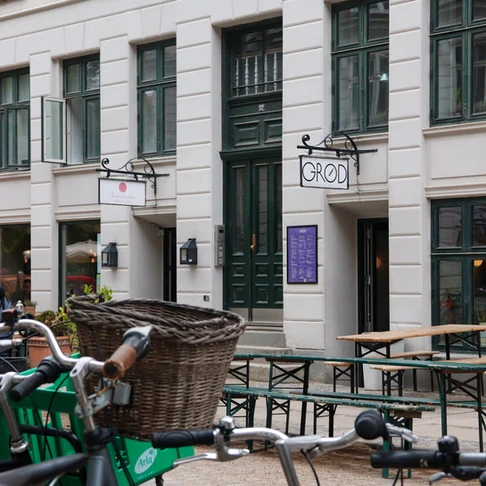
4) Try fresh food at Torvehallerne KBH
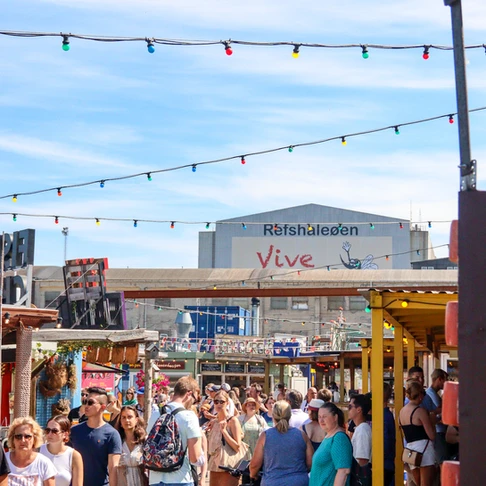
5) Walk around the “free and independent” Christiania neighbourhood
6) Take an iconic photo at Nyhavn
7) Visit the Royal Library
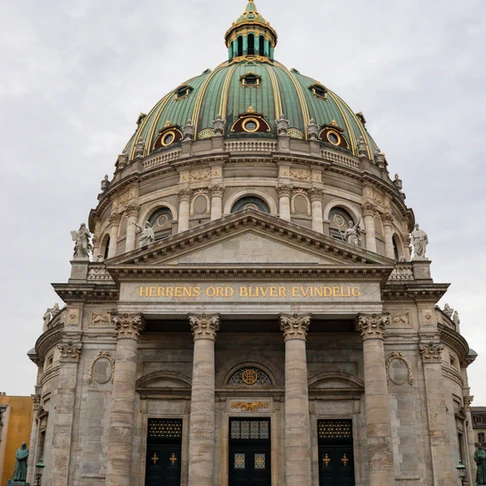
8) See Copenhagen from above at the Church of Our Saviour
9) Go vintage shopping
10) Admire Frederik’s Church
My favourite neighbourhoods
1) Frederiksberg – residential/young/cafes
2) Vesterbro – residential/bikeable/green
3) Nørrebro – rich/hipster/cafes
4) København V – industrial/bars/central station
5) Indre By (downtown) – shopping/centre/colourful
6) Christianshavn – canals/residential/traffic
7) Valby – residential/calm/safe
Cafes, restaurants, and nightlife
The food scene in Copenhagen is incredible. I haven’t tried as many places as I would have done if I had a similar income as the Danish, so I’ll leave a restaurant guide to food bloggers, but I can share some tips from my own experience!
Breakfast – brunch – lunch
Kihoskh
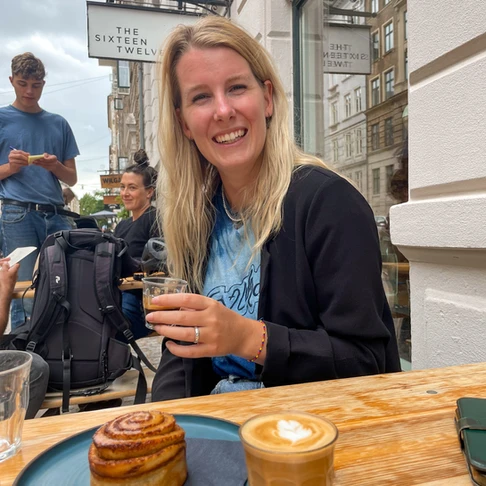
The Sixteen Twelve (great coffee)
Mad & Kaffe*
20 Grams*
Skt. Peders Bageri
Emmerys (fresh bread)
Buzz*
Dinner
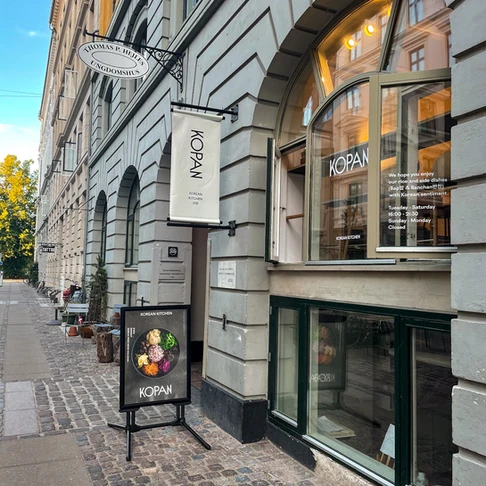
Kopan (tasty Korean food)
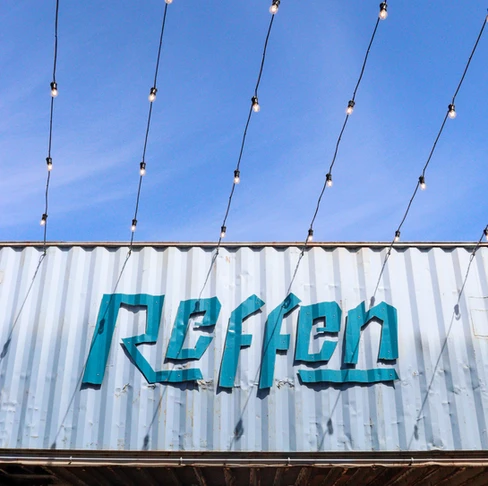
Reffen
Torvehallerne KBH
Drinks and nightlife
H15
Kødbyens Baghave (industrial area with outdoor bars during summer)
Copenhagen Downtown Hostel
Werkstatt*
Chateau Motel (entry = 100 DKK in 2022)
* I didn’t consume anything, but I walked by or considered it, and thought it was worth mentioning!
Where to stay
This obviously depends on whether you’re visiting Copenhagen solo, with your partner, a friend, or your family. I visited Copenhagen with my best friend and we stayed in an Airbnb in Valby. I can highly recommend our host! She’s very kind, makes homemade bread, and you won’t even notice she’s around. Our private room in her apartment had a sunny balcony attached to it, and we could make use of the kitchen.
As we had drinks in Copenhagen Downtown Hostel one Friday night, I can confirm that this is a great hostel for those looking for a party. Their bar is filled every night so you’ll always find someone to hang with! Don’t expect to fall asleep at 11 pm though. (;
Or have a look below for hotels and other types of accommodations. You’d be supporting my blog by booking your stay through one of these links, at no extra cost for you. Tak! <3
Why you should rent a bike
Copenhagen is one of the best cities to bike around in. I feel like I’m an expert on this topic, being Dutch, so trust me on this one! There are clear bicycle lanes, traffic lights, and signs. You’ll perfectly blend in with the locals, as they take their bikes to do their daily chores. I always prefer going by bike over going by bus, train or metro, as you’re more independent and you get to see a lot along your route! Make sure to always lock your bike and park them in the assigned places, and you’ll be fine. A bit of experience is helpful though, as the locals cycle pretty fast, and you’ve got to take the pedestrians into account too.
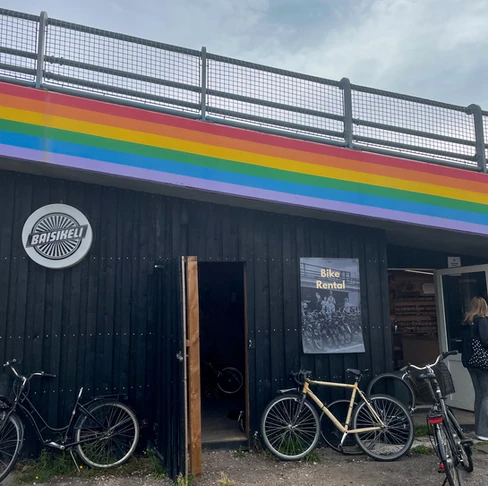
I can personally recommend Baisikeli as a place to rent a bike. Their staff is friendly, the prices are reasonable and you can pick your own bike (there are 3 different quality levels). We took the luxury bikes and paid about €37 pp for three full days. No deposit is needed. They’re located next to Dybbølsbro station.
On a budget?
No worries! I’m a firm believer that even the most expensive destinations can be visited on a budget. And I have to add that – compared to Amsterdam – I didn’t find the prices in Copenhagen that bad anyway.
Having a (communal) kitchen at your accommodation is a big plus, as you can just buy your breakfast essentials in the supermarket, and/or cook yourself a great meal for dinner. For lunch, I didn’t find the bread in the Danish supermarkets that good-looking, but you can easily get fresh bread at bakeries that are spread out across the city.
An espresso in a coffee bar costs around €3 – €3.5 and a cappuccino around €4 – €4.5. A sandwich in a lunch room costs somewhere between €8 and €12 and a meal for dinner can be enjoyed from €15. What I found most out of proportion was a (craft) beer in a cafe or restaurant. They cost around €5.5 – €8. A cocktail or mixed drink leans more towards Dutch standards: €10 – €12 (keep an eye on happy hours!).
You can save a lot of money by prepping your own lunch to go, buying beer in a supermarket, and doing free activities.
Enjoy Copenhagen!
Hope this is helpful! Feel free to send this article to a friend. You can take a look at my Copenhagen story highlight on Instagram for more info and footage. Or explore more destinations here!
Is Fez the new Marrakech? The city in the north of Morocco is authentic, full of culture and good food, and is home to friendly locals. It’s not yet a popular destination among tourists, so this is the perfect time to discover the city before the crowds will undoubtedly come! This also makes it a tad more difficult to find info about where to stay, where to eat, and what to do, so here’s a mini-guide to get you started.
n
Where to stay in Fez
n
Where to eat in Fez
n
What to do in Fez
n
1) Where to stay in Fez
You might’ve seen photos of them before. Gorgeous guesthouses with a light patio in the middle, featuring incredible mosaic details… riads! They’re a popular and – not unimportantly – affordable type of accommodation in Morocco. They have the same facilities as a regular hotel, but riads are (way) smaller and feel more like home.
nn
During my trip to Fez with my little brother, we stayed at Riad Tahra & Spa. It was the perfect accommodation in a calm part of the medina (old town) of Fez, and we found the staff very friendly! You get welcomed with traditional mint tea, the rooms are all unique, and you can spot amazing details throughout the whole building. Mohammed also happens to own another riad that’s within a 5-minute walk, where you can go for a refreshing dip in the pool. A delicious and complete breakfast (included in your stay) is served every morning between 7:30-10:30, after which it’s time to explore the medina.
n
n
2) Where to eat in Fez
Moroccan cuisine is mostly known for its delicious tajines: a dish with meat (usually chicken or beef). Don’t worry if you’re a vegetarian, though! I had no trouble finding veggie options on any menu. Typical dishes that usually have a vegetarian alternative are couscous and pastilla (a savoury pie). There are also plenty of restaurants in Fez that have more Western food options, such as burgers (haven’t stumbled upon a veggie burger, though), pasta, potatoes, and salads.
nn
The Ruined Garden
n
This restaurant is located in a beautiful – surprise – garden. It’s the patio of the adjacent Riad Idrissy, and the restaurant is open to the public from 1:00 – 9:30 pm. It’s best to reserve a table in advance. Especially if you’d like to order one of their speciality dishes!
nn
Mom’s Touch
n
You wouldn’t find this beautiful restaurant if you haven’t saved the location beforehand. It has the best rooftop, a lovely colourful interior, and friendly staff! It was my favourite spot in Fez.
nn
Café Clock
n
This popular restaurant among (young) tourists lives up to the hype. It has several levels and a nice rooftop. They also organise activities such as cooking classes.
n
n
3) What to do in Fez
Fez might not have as many tourist sights as an average big city, but I can guarantee you won’t get bored during three full days. Here’s a list of things to do in the old town.
n
Visit a tannery
n
Buy food at the souk
n
Have a look inside artisan shops
n
Watch the sunset from Marinid Tombs
n
Admire coppersmiths at Place Seffarine
n
Get a glimpse of a mosque
n
Take a typical tourist pic at the Blue Gate
n
Walk around the Andalusian neighbourhood
n
Explore the Jewish quarter
n
Relax in the park Jnan sbil
n
Treat yourself to a hammam
n
Learn how to cook the Moroccon way
n
n
n
Looking to get inspired by more articles like this one? Have a look at my other destinations.n
n
Do you have any questions about my travels, or do you see a great opportunity to collaborate? Feel free to send me an Instagram DM or email (floraflies.nl@gmail.com).
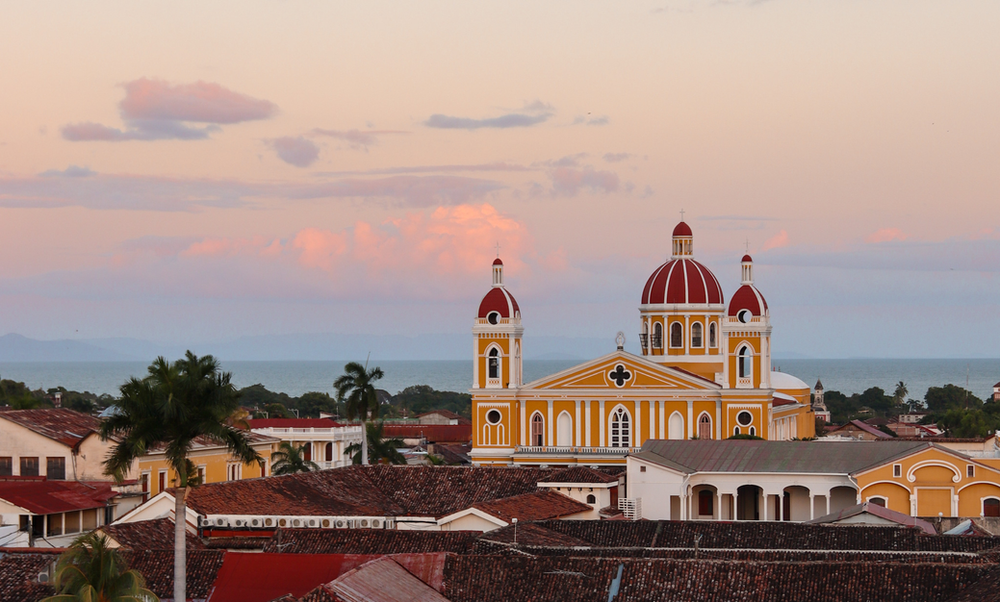
During my solo trip around Latin America, I’ve stayed in LOTS of hostels. As a solo traveller who looks out for hostels that stimulate mingling between backpackers, my top priorities are hostel activities, nice communal areas, and a hostel kitchen. Are you planning a trip to Nicaragua soon? I got you! These are my hostel recommendations for León, Managua, Little Corn Island, Granada, Ometepe, and San Juan del Sur.
n
León
n
Managua
n
Little Corn Island
n
Granada
n
Ometepe
n
San Juan del Sur
n
This post is in no way sponsored by or created in collaboration with any of the hostels. I only recommend these hostels because I either stayed there myself and had a great time, or heard lots of positive stories about it from other backpackers. The links I’ve put here are affiliate links. If you book a stay through one of those links, I’ll receive a small commission from Hostelworld or Booking, while you don’t pay anything extra! Thanks a lot for supporting my blog (:
n
León
n
Poco a Poco Hostel
n
A typical social hostel that attracts lots of solo travellers. I particularly enjoyed the pot luck barbecue. Every bed has its own ventilator, which is much needed in León. A must in León is doing a free walking tour, and I signed up for one through the hostel’s reception!
Not necessarily the most social hostel, but I guess Managua isn’t a popular stop in Nicaragua anyway. This is a good hostel location-wise; close to a shopping mall with La Colonia supermarket, and within walking distance of the best nightlife strip. The communal kitchen is spacious and complete.
Though it’s not a hostel, it’s a popular place to stay among backpackers. Along the east coast of the island, there are several beach cabins owned by different local families. Carlito’s place is one of them. Expect basic beds, a private bathroom, and a small terrace on the front with a hammock. Wake up early to witness an amazing sunrise from your hammock! There’s a small and limited communal kitchen (bring/buy your own oil/spices), but I can highly recommend having a budget-friendly dinner at Restaurante El Bosque (about a 10-min walk).
This place has a sort of similar vibe as Poco a Poco, so I loved it! It’s located right next to the cathedral, just a couple of blocks away from the central square. I stayed in the 8-person dorm and 10-person dorm. They all had a ventilator next to the bed, and that wasn’t an unnecessary luxury, because it gets incredibly hot in Granada. There’s a big communal kitchen where it’s easy to meet other backpackers.
It feels more like a guesthouse than a hostel. Mauro lives here with his family, so your money goes directly to a local family. He’s happy to help you out with anything! Casa Mauro is located in Moyagalpa, the main town of Isla Ometepe. You can easily walk to a supermarket and restaurants in town, and it’s super recommendable to rent a scooter and explore the island that way.
n
Communal kitchen
n
Terrace with hammocks and sofas
n
Friendly hosts
n
Animals in the garden (you might get woken up by a cockerel)
I switched to Hospedaje Central after one night in Casa Mauro because the latter was fully booked. Hospedaje Central is more like a very cheap hotel. There’s a big patio and an on-site bar/restaurant. The hotel’s description says there’s a communal kitchen, but this isn’t the case; it’s the restaurant’s kitchen which makes you feel like you’re walking in their way. You CAN store your food in their fridge though. I ended up making my own breakfast/lunch at the hostel and going out for dinner.
n
On-site public bar and restaurant
n
Central location in Moyagalpa
n
Big patio with plenty of space to chill/work
n
*they’re no longer on booking.com.
n
n
San Juan del Sur
n
Surf Town Hostel
n
I’m usually avoiding party hostels, but I figured: I’m in San Juan del Sur, I might as well go for it. And I loved it! Surf Town is owned by a friendly Canadian, and has a nice bar where you’ll easily meet fellow (solo) backpackers and a swimming pool next to it. Loud music would stop at around 11 pm, which makes you able to sleep well if you want to. The communal kitchen is basic but decent enough to prepare your own meals.
I also stayed at Hola Ola afterwards, since it had been recommended to me many times. The place didn’t live up to my expectations though. If you stay here, I would recommend doing so on a Saturday, as they organise a fun beach party weekly. Keep in mind that Hola Ola is located out of town; it’s about a 20 min walk along the beach to get to downtown. There’s no way to prep your own meals whilst staying at this hostel, which is a huge flaw for me, but I recommend having dinner at the local soda next door rather than at the hostel (cheaper and better)!
Looking for some more info about this part of the world? Have a look at my other destinations in Latin America.n
n
Do you have any questions about my travels, or do you see a great opportunity to collaborate? Feel free to send me an Instagram DM or email (floraflies.nl@gmail.com).
During my solo trip around Latin America, I’ve stayed in LOTS of hostels. As a solo traveller who looks out for hostels that stimulate mingling between backpackers, my top priorities are hostel activities, nice communal areas, and a hostel kitchen. Are you planning a trip to Guatemala soon? I got you! These are my hostel recommendations for Antigua, Lake Atitlan, Lanquin, and Flores.
n
Antigua
n
Lake Atitlan
n
Lanquin
n
Flores
n
This post is in no way sponsored by or created in collaboration with any of the hostels. I only recommend these hostels because I either stayed there myself and had a great time, or heard lots of positive stories about it from other backpackers. The links I’ve put here are affiliate links. If you book a stay through one of those links, I’ll receive a small commission from Hostelworld or Booking, while you don’t pay anything extra! Thanks a lot for supporting my blog (:
n
Antigua
n
Maya Papaya Hostel
n
The first hostel of my solo trip. I’d booked an airport transfer with them, as I arrived at the airport of Guatemala City late at night. Overall, a great hostel with decent facilities and very nice bunk beds with curtains. I stayed in their female dorm.
I returned to Antigua a second time, and heard great stories about Somos, so I decided to go there this time. Best decision! Great social vibes, fun volunteers, a hot tub next to the hostel bar… and pods in their 8-person dorm. I recommend staying in this particular dorm, because it’s the only one with exterior windows. The blankets don’t feel too clean, but this hostel would still make it to my top 5 across Central America.
n
Hot tub
n
Two patios – one is mellow, the other one is where the hostel bar and hot tub are
Not a hostel, still worth a mention. There’s nothing better than treating yourself to a private room (with a private bathroom) after hiking the Acatenango volcano. The hotel feels more like a guesthouse. It’s small, has a friendly family living there, and they can prepare you breakfast in the morning for a fair price. Also got my laundry done here!
Panajachel is the main town along the lake, so I decided to stay there first. I usually avoid big chain hostels such as Selina, but it seemed like the best option in town for me. And it didn’t disappoint! Loved the morning yoga sessions with a view over the volcano. The communal kitchen was spacious and complete. It wasn’t very lively when I was there, but I still made some friends here and enjoyed my stay!
I took the boat from Panajachel to Santa Cruz, and stayed at La Iguana Perdida. It’s located right on the deck where you arrive. Facilities are very basic (low environmental impact), but the vibes are great! Make sure to be here on a Saturday, when they hold a barbecue (vegetarian options available) and everyone needs to get dressed up (the hostel provides the costumes).
I haven’t stayed here myself, but I’d heard great stories about it. I paid Free Cerveza a visit during a walk from La Iguana Perdida, and it looked like a nice place! They organize daily activities, have paddle boards you can use for free, and you sleep in a teepee tent. Just like La Iguana Perdida: basic facilities!
This hostel isn’t on hostelworld or booking, so you’ve got to book your stay through their website. This is the hostel where basically every backpacker that likes to go to Semuc Champey goes to, so it’s easy to meet people here. I had high expectations. The views from the infinity pool over the valley were indeed incredible, and the deluxe dorm lived up to its name. What I didn’t really like is that they don’t have a communal kitchen, and their on-site restaurant is pretty expensive (and the food isn’t even that great). It’s located a bit out of town (Lanquin), so I settled for the hostel’s restaurant instead of walking to town, but opting for a local restaurant in town might be better.
n
On-site restaurant and bar
n
No communal kitchen
n
Infinity pool + hot tub with a view
n
Limited Wi-Fi
n
You can book a tour to Semuc Champey here
n
n
n
Flores
n
Los Amigos Hostel
n
Again, the place where almost every backpacker goes to. It’s located in the heart of the island of Flores. I stayed in a dorm with air-conditioning here, and that wasn’t an unnecessary luxury, because it gets incredibly hot in Flores. There’s a communal kitchen, but don’t expect too much from its quality. It was possible to make my own dinner here, though!
Looking for some more info about this part of the world? Have a look at my other destinations in Latin America.n
n
Do you have any questions about my travels, or do you see a great opportunity to collaborate? Feel free to send me an Instagram DM or email (floraflies.nl@gmail.com).
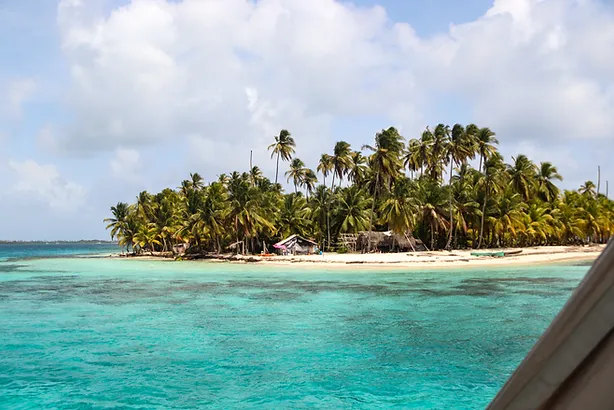
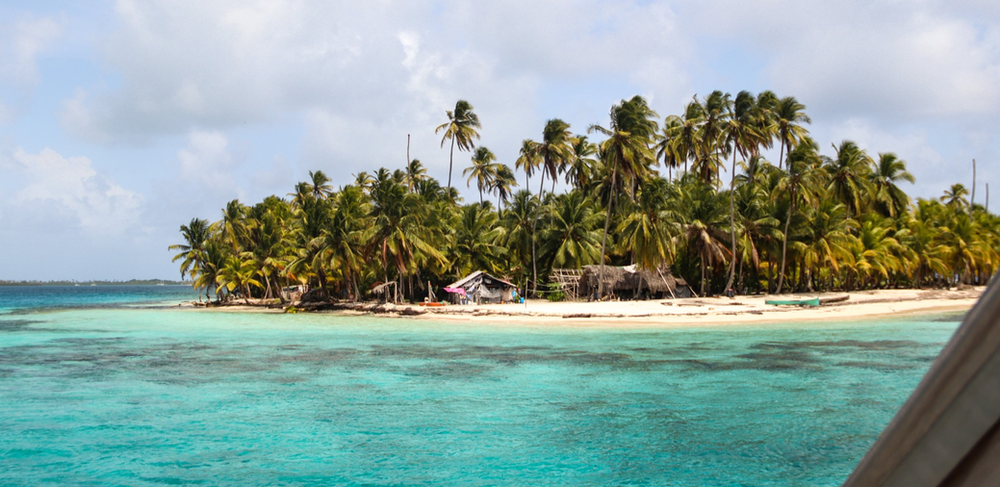
I think I can say this trip has been the highlight of 6.5 months of slow travelling around Latin America. In March 2022, I went on a five-night sailing trip from Colombia to Panama. The experience of living on a sailboat was incredible already. Not to mention, I got to spend three days island hopping on the San Blas Islands. It’s an archipelago in the Caribbean Sea, just a 30-min speedboat ride from the north coast of Panama. Let me tell you everything you need to know before embarking on one of the most unforgettable adventures of your Latin America travels!
n
Flying or sailing?
n
Costs of the trip
n
What to bring
n
Itinerary
n
FAQ
n
1) Flying or sailing?
The border of Panama and Colombia connects respectively Central America and South America. What’s interesting about this particular border, though, is that there’s no official road here, so there are no buses going back and forth either. This means that if you’d like to go from Panama to Colombia and vice versa, you’ve got to find another form of transportation. Flying would be the most obvious option, but how many times in your life do you get the opportunity to sail from one country to another? Whilst passing one of the most beautiful and relatively undiscovered island archipelagos of the world? Easy decision right…
nn
Well, if the costs of the sailing trip wouldn’t be so high. Whilst travelling around Latin America, you’ll probably hear about this trip from other backpackers who’ve done it already. You’ll also hear lots of backpackers say they chose to fly from Panama to Colombia (or from Colombia to Panama), since they thought the sailing trip was too expensive.
nn
Here’s what I think: yes, it’s a lot of money if you’re sticking to a travel budget like I was. Is it expensive, though? I don’t think so. The sailboats are well maintained, there are at least three crew members on board (including a cook!), there are additional features on each boat (depending on the company and boat you go with, it could be: a speaker, a dinghy (small motorboat to go to other islands) and snorkelling equipment), and you’ve basically got your expenses of five days covered. Not to mention that you get an experience of a lifetime! Worth every penny. Let’s see how many pennies we’re talking about exactly…
n
n
n
2) Costs of the trip
I sailed from Colombia to Panama with Blue Sailing. There are several companies running this trip, but I believe they all have similar prices. Here’s a breakdown of the costs.
nn
Colombia to Panama:
n
Sailing trip: 600 USD (includes 3 daily meals, water and coffee)
n
Grocery shopping beforehand: 0-40 USD (mostly depending on how much alcohol you’d like to bring)
n
Taxes to visit the San Blas Islands: 20 USD
n
Expenses on the San Blas Islands: 0-20 USD (coconuts, other drinks, souvenirs)
n
Motorboat from your sailboat to the north coast of Panama: 18 USD
n
Arranged transport from north coast Panama to Panama City: 25 USD
n
Total = 663 – 723 US dollars
nn
Panama to Colombia:
n
Sailing trip: 600 USD (includes 3 daily meals, water and coffee)
n
Grocery shopping beforehand: 0-40 USD (mostly depending on how much alcohol you’d like to bring)
n
Arranged transport from Panama City to your sailboat: 60 USD*
n
Taxes to visit the San Blas Islands: 20 USD
n
Expenses on the San Blas Islands: 0-20 USD (coconuts, other drinks, souvenirs)
n
Total = 680 – 740 US dollars
nn
* the place where your sailboat will be waiting for you may depend on the weather conditions, so this price can vary
nn
You book this trip by sending an email to Blue Sailing. After having settled the date of departure, they’ll send you a payment request of 50 USD to confirm your spot. You pay the other 550 USD in cash, on the day of departure.
nn
n
n
3) What to bring
Assuming that you’re travelling with your big backpack and a smaller daypack like I did, I would recommend putting everything you don’t need in your big backpack, and just pack your small daypack for this particular trip. Your big backpack will then get stored onboard, and you’ll get it back after the trip (if you really need something from your backpack during the sailing trip, you can obviously get it). This is what you need to bring in your small daypack:
n
2 bikinis/swim shorts
n
3/4 T-shirts (one of them to wear during snorkelling)
dry bag (not necessary, but if you have one, bring it)
n
toiletries
n
motion sickness pills
n
baby tissues (to feel a bit “fresher” without having a shower…)
n
eco-friendly sunscreen (preferably SPF 50+)
n
aftersun
n
eco-friendly shampoo bar (on day 4, you might get the opportunity to shower with sweet water on the back of the sailing boat)
n
mosquito repellent
n
cards (or another game)
n
snacks (not too many, as the meals are filling)
n
rum (to create a coco loco: a coconut filled with coconut water and rum)
n
other (alcoholic) beverages (only water and coffee are provided onboard)
n
at least 70 USD in cash (see cost breakdown)
n
n
n
4) Itinerary
The precise itinerary depends on the weather conditions. I had relatively calm weather sailing from Colombia to Panama. This is what my trip looked like.
nn
Colombia to Panama
nn
Day 1
n
10 am: meeting up in the harbour of Cartagena to meet the crew and fellow passengers. Here you’ll pay the 550 USD in cash, and you can exchange any leftover Colombian pesos for US dollars (the currency they use in Panama, and thus on the San Blas Islands). You can already drop off your big backpack that you won’t be using, or you can decide to do this tonight.
nn
11 am – 7 pm: free time in Cartagena
nn
8 pm: meet up on the sailboat in the harbour again. Everyone gets the chance to do some grocery shopping or cash withdrawal in the supermarket nearby. The briefing will be done which includes information about safety, seasickness and what the upcoming days will look like. The beds will be divided too. After all these practical things, it’s time to leave Cartagena between 10-12 pm! I went to bed at around 1 am, and fell asleep right before things got wavy.
nn
Day 2
n
You’ll wake up in a moving bed on a moving boat; let’s conquer the open sea! If you’re as lucky as I was, there will be a group of dolphins swimming along! You’ll spend the day getting to know your fellow backpackers on board, reading or listening to some music, or napping. Seasickness can occur, more about that in the FAQ.
nn
Day 3
n
Whoohooo, you’ve made it to the San Blas Islands! Depending on the weather conditions, you’ll arrive here between 9 am – 2 pm. I got woken up at 8:30 am after the second night on the open sea, since we were already approaching the first islands this early. No more big waves from now on, time to enjoy paradise!
nn
Day 4
n
Your second day on the San Blas Islands. You spend these days island hopping, anchoring the sailboat in different spots. On the first two days in paradise, you’ve got the islands to yourself! Or well, let’s not forget about the hospitable Gunas who live on some islands. They’ll kindly welcome you to their home! Make sure to bring some cash so that you can buy a drink or souvenir from them.
nn
Day 5
n
The third and final day of island hopping. After lots of volleyball games, cocos locos, snorkelling and laughter, it’s time to leave tomorrow. Not thinking about that just yet though, as you’ve still got a full day of joy ahead!
nn
Day 6
n
Time to wave the crew and the boat goodbye… bittersweet! You get picked up early (8 am) by a smaller motorboat, that will bring you and your backpack to the mainland of Panama. Drivers will be waiting for your group, to drive you to Panama City. Make sure to have exchanged phone numbers with your fellow sailing mates and crew earlier, so that you can exchange photos and videos, and stay in touch for further plans in Panama!
nn
Panama to Colombia
nn
I can’t provide you with the itinerary from Panama to Colombia as detailed as the other way around, but keep in mind that you start on the San Blas Islands (as they’re located only 30 min off the coast), and have to conquer the open sea to Colombia afterwards. I personally thought it was perfect that we first had the “tough” open sea part coming from Colombia, and could finish on a high on the San Blas Islands. Don’t let this hold you back though, as I’ve only heard great stories from backpackers doing the trip from Panama to Colombia too!
n
n
n
5) FAQ
n
Is this trip recommendable for (female) solo travellers?
n
Absolutely! Depending on the boat you’re sailing with, you’re in a group of about 8-14 travellers. My group consisted of one couple, three friend duos, and six solo travellers. Everyone got along very well! You’ll bond very quickly if you’re all living on a boat for about 5-6 days, trust me… (;
n
n
What about seasickness?
n
Along with the price of the trip, seasickness is the main thing that holds travellers back from going on this sailing trip. I usually never get any type of motion sickness, but I have to say that day 2 was a bit of a challenge for me. The motion sickness pills helped me not get too nauseous. I took one on the first evening in Cartagena, one the next morning at breakfast (this one was much needed), and one in the evening again, so three in total! I could’ve taken an extra one on day 2, but they also made me feel very tired, so I decided not to.
nn
In the end, no one on our boat really got sick, which is rare! Sailing on the open sea from the San Blas to Colombia is supposed to be a bit rougher than the other way around, because of the direction of the wind.
nn
If I were you, I would just expect that you get seasick and accept it beforehand. In the end, it’s only about 36 hours on the open sea, and the whole trip is just too amazing to let fear for those 36 hours hold you back! The motion sickness pills really help too, along with laying on the front of the boat while taking in the fresh air. Maybe you won’t even get sick either!
nn
What I didn’t expect beforehand, is landsickness. The two days after the trip (day 7 and 8), it felt like the ground was moving underneath me. When I was walking around in my dorm in Panama City, I had to grab my bunk bed to prevent myself from falling. It was as if I was still on the open sea, even though that was 5 days ago! The weirdest sensation.
n
n
What is it like to sleep onboard?
n
Considering I shared a tiny 2-person bed with a very tall friend of mine, I slept relatively well! On the first two nights, I easily fell asleep because of the motion sickness pills. I did get woken up frequently, either by the big waves that will move you in unpredictable directions or by fellow passengers who needed to go to the bathroom (which was located next to my bed).
nn
During the other three nights, the waves were peanuts compared to nights 1 and 2, as you’re anchored in the calm sea of the San Blas. Don’t expect lots of sleeping hours though, you’ll probably wake up early every morning. Which is a good thing if you get to wake up in paradise!
n
n
Is there Wi-Fi or internet?
n
Nope! And I wouldn’t want to have it any other way. For someone who spends a lot of time on her phone daily, it was amazing to just put my phone somewhere and not look back. Well, only for a photo or video from time to time then, because the views are gorgeous.
nn
There is internet on some of the San Blas Islands, but it’s unreliable, and I didn’t even search for it. Make sure to text loved ones beforehand though, to let them know you won’t be receiving their messages in the upcoming 5-6 days. They can track your boat via the website of Blue Sailing, as there’s a GPS onboard!
n
n
Which sailboat from Blue Sailing did you go with?
n
I went with the Ti Vaou, and I can highly recommend this boat*, especially if you’re a solo traveller between 20-35 years old, looking to have a great time drinking beers and cocos locos with strangers who quickly turn into friends, while not getting too hungover to fully enjoy the beauty of the San Blas Islands!
nn
The Ti Vaou crew was amazing (they don’t owe the boat, but usually work on the same one for a while). Captain Tote (José Miguel) made sure we had a safe trip, and he brought us to the most beautiful islands, along with Frank (aka Nene) and Mateo. Chef Oscar was the best cook and brought great vibes, as long as he’d peacefully had his first coffee in the morning. His own words. (;
nn
Not irrelevant, Ti Vaou is a catamaran, which means it’s a bit more stable on the open sea than a regular sailboat! It has plenty of deck space too.
nn
*Keep in mind that you cannot choose your boat. All boats are scheduled on certain dates, so if you want to go on a specific boat, you have to be flexible! Just send Blue Sailing an email with the range of dates you’d be available to depart on, and they’ll send you the information about which boats are departing on those dates.
n
n
What did you eat onboard? Are there vegetarian options available?
n
The meals were great! On day 1 you’ve got to have had dinner before the departure meeting time (8 pm in my case). From day 2 to day 5 you get three meals a day. On day 6 you get breakfast, and then it’s time to leave.
nn
You can email any diet restrictions to Blue Sailing beforehand. I’m vegetarian, along with one other guy from my group, and we always got a very tasty vegetarian alternative. Breakfast was usually something sweet (oatmeal, sandwiches, fruits) or eggs. Lunch and dinner varied from pasta to soup to sandwiches to rice.
nn
Since the indigenous Guna community on the San Blas Islands eat fish daily (they have very limited sources on the islands), I had decided to make an exception for fish (being vegetarian and not eating fish) for this trip. We had fish for dinner twice (it’s possible to get a vegetarian alternative again!), and having freshly caught fish was a nice experience!
Looking for some more info about this part of the world? Have a look at my other destinations in Latin America.n
n
Do you have any questions about my travels, or do you see a great opportunity to collaborate? Feel free to send me an Instagram DM or email (floraflies.nl@gmail.com).
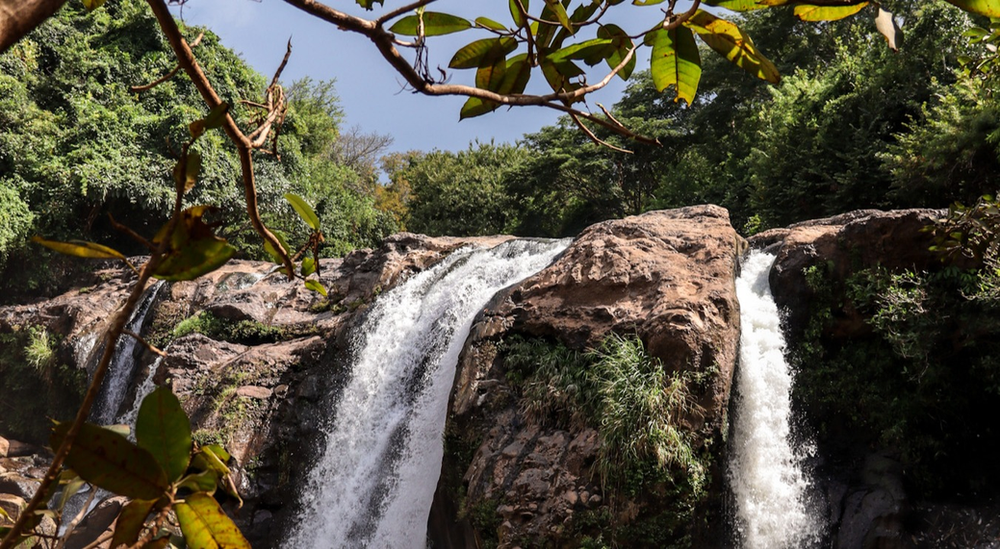
Santa Ana was one of my favourite stops in El Salvador. It’s the second-biggest city in the country, but it still feels more like a town if you walk around the city centre. Santa Ana is also the perfect base for a couple of day trips. One of them being a visit to Salto de Malacatiupan. It’s a waterfall and a hot spring, which is a pretty unique combination! At first glance, getting there seems to be as difficult as the pronunciation of the place, so in this guide, I’ll tell you everything you need to know before your visit. You’ll see it’s actually fairly easy to get to Salto de Malacatiupan and the super friendly Salvadorans are more than happy to help you out with your Spanish pronunciation as you go…
n
How to get there
n
Bus
nn
Bus 210 leaves from the bus station called Francisco Lara Pineda, which is located behind the market. Verify at your hostel at what times the bus departs. Bus 210 brings you to a nice town called Atiquizaya for only $0.50. It will drop you off at Parque San Juan, from where you’ve got to walk 5-10 minutes to Parque 5 de Noviembre. The next bus ($0.50) to Salto de Malacatiupan departs in front of Residencia de Ancianos. Locals will be more than willing to point you in the right direction!
nn
Keep in mind that the last bus from Salto de Malacatiupan back to Atiquizaya leaves at 4:00 pm. We’d been waiting at the entrance for about half an hour (from 3:45-4:15) and as we were on the edge of losing faith that we would make it back to Santa Ana, we were very lucky we could hitch a ride with locals who were heading to Santa Ana as well! I’d say hitchhiking is very common and safe in El Salvador, as many people drive pickup trucks and are happy to have you in the back of their car. You should of course always be cautious and never step into a car if you don’t feel comfortable with it!
n
n
n
Entry fee and opening hours
(October, 2021)
nn
Salto de Malacatiupan is accessible for everyone, at any time. I feel like you could just walk towards the waterfall without paying an official entry fee, as there’s no ticket counter. As we entered the site, there was a local who charged us $1 per person. I still don’t really know whether that’s an official entry fee, but I would have happily paid this guy more!
n
Before you go
n
Keep in mind that other than a free car park, there are hardly any on-site facilities. So bring some snacks and plenty of water!
nn
The water has a temperature of around 35-40 degrees Celsius, which isn’t that refreshing on a hot and sunny day. Go early if you’d like to properly enjoy a dip in the water.
nn
I can recommend wearing waterproof footwear. I wore my Teva sandals, which was very convenient as I had more grip while walking around the river and falls. My friends were wearing sneakers or flip-flops, and they would just walk barefoot, so that’s definitely doable as well! Just be careful when you go to the small pool next to the waterfall, as that part gets very slippery.
n
n
n
Looking for some more info about this part of the world? Have a look at my other destinations in Latin America.n
n
Do you have any questions about my travels, or do you see a great opportunity to collaborate? Feel free to send me an Instagram DM or email (floraflies.nl@gmail.com).
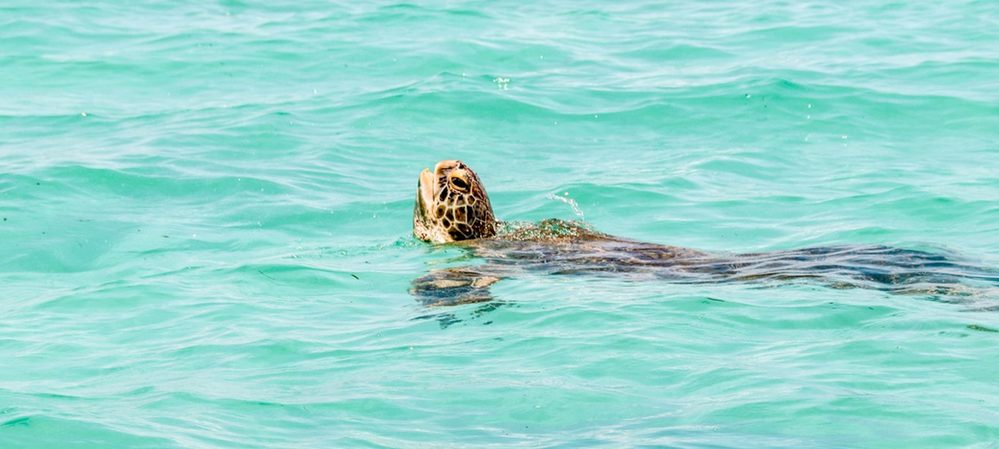
The highlight of my trip around the Yucatán Peninsula was a day trip to the Sian Ka’an Biosphere Reserve. It’s home to lots of birds, reptiles and other species. What I particularly came visiting for, though, was the gorgeous underwater life you can find here. The Mesoamerican coral reef – which is the second-biggest reef in the world – stretches along the coast of Sian Ka’an Biosphere Reserve. It makes it a perfect spot for a boat tour, which is what I opted for. In this mini-guide, I’ll give you all the info about this day trip from Tulum.
n
A responsible visit
n
How to get there
n
About the tour
n
A responsible visit
n
First, I’d like to stress that this particular part of the Biosphere Reserve hasn’t yet been discovered by the big crowds that spend their holiday in Tulum. This could be due to the fact that it’s one hell of a road to get there. When we arrived and apologized to our guide for being late, he winked and told us with a smile: “This road keeps the people away.”
nn
Whether “to share or not to share” this activity has kept me debating. As I like supporting local businesses and giving alternatives for the Westernised Tulum, without potentially playing a role in making this spot go “viral”, I’ve decided to not geotag the location on Instagram, and write a blog post about it instead.
nn
To make sure your visit will be a responsible one:
n
Leave nothing but footprints
n
Grab food at one of the local restaurants
n
Respect the locals and the town’s sleepy vibes
n
Only wear sunscreen if it’s coral friendly
n
n
n
How to get there
n
Now that you’re ready to explore this place responsibly, it’s time to get into the details of the trip. The town where the snorkelling tour departs from is called Punta Allen. It’s the southernmost point of the Sian Ka’an Biosphere Reserve, which is why this place isn’t as much visited as other places in the reserve. The town itself is small, quiet and only has a handful of restaurants. Bear in mind that there’s hardly any signal here! It’s located along the gorgeous coastline of the Sian Ka’an Biosphere Reserve, which also makes it a great place to stay for a couple of beach days.
n
The most convenient way to get to Punta Allen is by (rental) car. While it’s only about a 50 km drive from Tulum, it could take you up to 2-3 hours, depending on the type of car and how fast it can drive on a gravel road. If you’re starting in Tulum Pueblo, you should add another 30 minutes to get to the Hotel Zone and drive southwards along the coast from there. Where you leave Tulum and its Hotel Zone, you already drive into Sian Ka’an. You’ve got to pay a small fee (90 pesos, August 2021) here to enter the reserve, which is meant to keep the reserve protected in its best natural state. Turtles used to be hunted down, this luckily no longer happens.
nn
I’ve also seen a few minivans (colectivos) driving down the road, though I’m not sure whether they drive all the way down to Punta Allen. Your ho(s)tel should be able to help you out with transport if you don’t have a rental car. You could also book a full tour with transport from Tulum to Punta Allen (and back) included.
n
n
n
About the tour
n
I went with Explore Sian Ka’an on a 4-hour private boat tour (4 persons), which cost around €130 in total (no transport/food). An experienced guide takes you to different spots by boat. Wearing a life jacket is mandatory, and you’ll see why once the boat catches speed. As we bumped from the lagoon to the ocean, I couldn’t help but have a big smile on my face. The water has every shade of blue, you’ll pass mangroves and see lots of birds. This part of the trip is worth it already, though we haven’t made it to the actual highlights yet… We got to see a group of dolphins, a few turtles and a stingray when we were on our way to the coral reef. Magical! Once we made it to the Mesoamerican reef, our guide released the anchor, and we got to explore the underwater world. The coral is still quite colourful here, we saw lots of beautiful fish, and even a nurse shark! Before going back to Punta Allen, we went for one final swim in the clearest water I’ve ever seen. The perfect ending of the tour.
nn
Note that seeing dolphins, turtles, stingrays and sharks can never be 100% guaranteed.
n
Looking for some more info about the Yucatán Peninsula? Have a look at my other blog articles about Mexico, or fly along to another destination! n
n
Do you have any questions about my travels, or do you see a great opportunity to collaborate? Feel free to send me an Instagram DM or email (floraflies.nl@gmail.com).
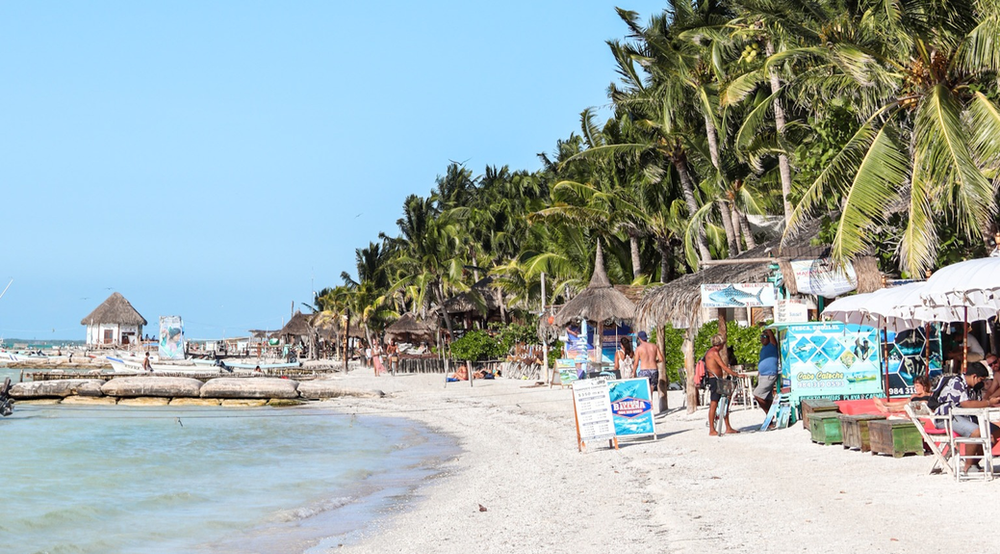
I think I’ve left my heart in Holbox… Isla Holbox is a small island located north of Cancún. It only counts one town (Holbox), yet you won’t get bored while staying here for a week. If you like disconnecting, white sand beaches and laid-back vibes, then this is the place for you. There are no cars to be found here, the main mode of transportation in and around town is by golf cart. ATMs sometimes just stop working or run out of money, so bring enough cash with you before your visit. Don’t expect any great functioning internet either, as service often gets lost on the island. Luckily, there’s a lot of things to do here that you don’t need any Wi-Fi for anyway!
n
Street art
n
Punta Mosquito
n
Cycling
n
Golf cart
n
Sunset hotspot
n
Refugio Animal Holbox
n
Whale sharks
n
Kitesurfing
n
Punta Cocos
n
Secluded beaches
n
#1 Go on the hunt for the best street art
n
Holbox Pueblo has some of the best street art. In 2014, the International Public Art Festival took place on the island. Ever since, it’s been a street art lover’s paradise. All the murals have their own story behind them. You wouldn’t even need Google Maps to find them, as you come across a different colourful mural around every corner!
n
#2 Walk all the way to Punta Mosquito
n
Holbox is part of the nature reserve called Yuk Balam. There’s a lot of wildlife here. From the public beach in town, a sandbank reaches all the way to Punta Mosquito, so you can actually walk there via the shallow ocean! You can only actually reach Punta Mosquito with a guide, but you could also just enjoy the sceneries till about halfway by yourself.
n
n
n
#3 Rent a bicycle
n
To me, biking is always the best way to get around in smaller places. You’re even allowed to bike on the beach here, which is an experience on its own already. It also makes it a great vehicle to spot all the street art in town. I rented mine at Bikes Holbox. You can even request to let them drop your bikes off at your accommodation!
n
#4 Rent a golf cart
n
Since the golf carts are a thing on the island, you basically need to hop on one! Taxis here are in the form of golf carts and you only pay 100-300 pesos (depending on the distance) for a ride. What might even be funnier is renting a golf cart yourself! I rented one at Monkey’s Golf Cart Rental, but I can’t really recommend them in terms of service. I’m not sure if there are other parties renting golf carts as well, but if there are, go with them!
n
n
n
#5 Enjoy drinks during sunset at Hotel Zomay Holbox
n
Holbox is known for having the best sunsets of Quintana Roo since the main beaches are on the west side of the island. One of my favourite spots to watch it was at Hotel Zomay Holbox. Every night, a bunch of travellers gather here to witness the sky turning into all shades of pink.
n
#6 Help out at Refugio Animal Holbox
n
The amount of stray dogs in Mexico is shocking for me as a Dutchie. Yet, here at Refugio Animal Holbox, they provide shelter for all of them. They make sure there are no stray dogs on the island, which is amazing. They obviously need the right resources to take care of all the dogs (as well as cats and other animals) that they have at the refugee. You can stop by to make a donation, bring some toys/treats for the animals, and/or you could help them out by walking with one of the dogs!
n
n
n
#7 Swim with whale sharks
n
Holbox is actually one of the few places from where you can go on a whale shark tour. Keep in mind that it’s still a 2-3 hour (bumpy) boat ride to get to the location though, but from what I’ve heard, it should be so worth it!
n
#8 Go kitesurfing
n
If the weather allows it, Holbox is an amazing place to go kitesurfing. Whether it’s your first time and you’d like to take classes, or if you’re experienced and just like to rent the gear, Holbox is a perfect fit. The water is crystal clear, the ocean a bit shallow and there usually is enough wind.
n
n
n
#9 Enjoy the views from Punta Cocos
n
On the most western part of the island, you’ll find Punta Cocos. There’s just one small bar here, some swings/places to sit at, and you can see the mainland from here. Another great spot to enjoy the sunset from!
n
#10 Chill at the quieter beaches west of town
n
The main public beach can get pretty crowded, so even though you’ll find the best bars and restaurants here, I can also recommend you to walk to the beaches west of town! It’s quieter here, meaning you have the ocean for yourself sometimes.
n
Looking for some more info about the Yucatán Peninsula? Have a look at my other blog articles about Mexico, or fly along to another destination! n
n
Do you have any questions about my travels, or do you see a great opportunity to collaborate? Feel free to send me an Instagram DM or email (floraflies.nl@gmail.com).
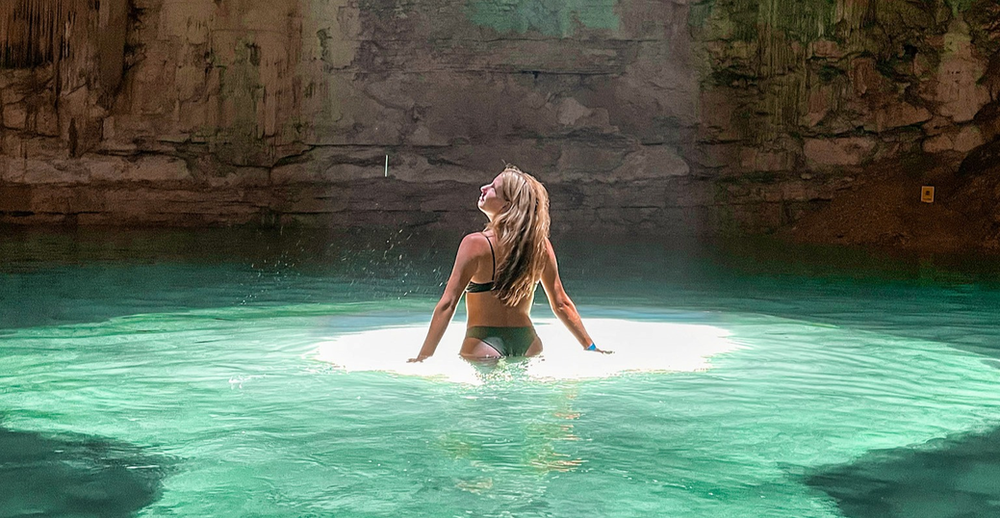
Cenote Suytun is unarguably the most photogenic cenote in the Yucatán Peninsula. You’ve probably come across lots of Instagram photos of this place already. So had I, and I have to say this cenote certainly didn’t disappoint me in real life. The magical beam of light is even more incredible in real life. Note that you’ve got to be lucky with the weather, though. You’ll logically only see the most vibrant light beam if the sun’s doing her job. I can’t guarantee perfect weather, but I CAN provide you with some helpful tips and info for your visit to Cenote Suytun!
n
How to get there
n
Cenote Suytun is located about 8 km east of Valladolid. One of the many reasons to stay in Valladolid for a couple of days is that you’ll find many fun activities within just a short driving distance. There are three common ways to get to Cenote Suytun from Valladolid:
nn
Car
n
It takes around 15 minutes to drive from Valladolid to Cenote Suytun, depending on the location of the accommodation you’re staying at. I stayed at Hotel Los Frailes (very helpful people at the reception, beautiful swimming pool, great prices!). I combined visiting Cenote Oxmán with Cenote Suytun, with the driving distance between them being around 14 km (15-20 minutes).
nn
Bicycle
n
Cycling is an option as well. It should be around a 30-minute cycle. Keep in mind that there aren’t any cycling paths here, meaning you’d have to cycle along the highway.
nn
Taxi
n
In case you don’t possess a (rental) car or bicycle, a taxi is a great (and relatively cheap) alternative. To get back to your accommodation in Valladolid from Cenote Suytun, just ask the restaurant or reception whether they could call you a cab.
n
n
n
Entry fee and opening hours
(August, 2021)
nn
Cenote Suytun is open from 10 am – 5 pm, meaning you can make use of all the facilities during that time. At the entrance, you’ve got to pay an entry fee of 150 Mexican pesos, which calculates to 6 euros. This can be paid by credit card (Visa/Mastercard) or with cash. You receive a bracelet that allows you to leave and enter the place throughout the day.
n
Facilities
n
When you enter the property, you’ll find several souvenir stands.
nn
There’s an outdoor shower that everyone has to use before entering the cenote. This is common at many cenotes in the Yucatán Peninsula, since you get to rinse any chemicals off of your body that way.
nn
Wearing a life jacket is mandatory at Cenote Suytun. The life jackets are included in the entry fee. You don’t have to wear them on the platform where you take the photos, though!
nn
There are obviously bathrooms as well, and there’s a free car park.
nn
Close to the parking, you’ll find a restaurant, which serves a buffet for economic prices!
n
n
n
Before you go
n
I’d normally recommend you to go early, because just like at any tourist attraction, Cenote Suytun gets pretty crowded around noon. At Cenote Suytun this isn’t for no reason, though, since the light beam is perfectly located in the middle somewhere between 12:30 – 1:15 pm. To me, it’s very much worth it to visit Cenote Suytun around that time of the day! Another pro is that you can combine your visit to Suytun with Oxmán (10 am) that way.
nn
Very obvious yet worth mentioning: bring your camera!* Like I said, Suytun is the most photogenic cenote out there. Don’t forget to take some photos from above as well. Cenote Suytun luckily doesn’t charge you extra for bringing in cameras, unlike some other tourist sites in the Yucatán Peninsula.
nn
This location can only stay this pretty if we treat it accordingly. I know this isn’t the best medical advice, but don’t apply sunscreen. The chemicals in sunscreen can harm the environment. Luckily, you won’t be exposed to direct sunlight at all in this cenote. And you’ve got to rinse it off under the outdoor shower anyway!
n
Looking for some more info about the Yucatán Peninsula? Have a look at my other blog articles about Mexico, or fly along to another destination! n
n
Do you have any questions about my travels, or do you see a great opportunity to collaborate? Feel free to send me an Instagram DM or email (floraflies.nl@gmail.com).
nn
*note that the beam of light is gorgeous, but that it also makes it a very tough shooting condition. I couldn’t manage to get the camera settings right on time – since there’s a line of people waiting to get their photos as well – so the photos that you see on this page are all taken with an iPhone 12.